Learning Target: I can draw an object by seeing simple shapes.
Learning Evidence and Assessment: Students will produce a drawing based on simple shapes.
Academic Language: Shape: a two dimensional figure that has height and width (could include specific examples of shapes, like square, rectangle, oval, circle, etc)
Lesson Opening:
Optional: have students draw the objects you are going to break into shapes before you talk about the best way to draw them. This gives them a baseline and hopefully helps them see how seeing shapes will help them draw.
Project an image of something familiar to students, a man made object with simple shapes (mug, scissor, stapler, glue bottle, etc). Ask students what basic shapes they see in the image. Use the pen to trace rectangles, triangles, circles, ovals, or squares. Encourage discussion.
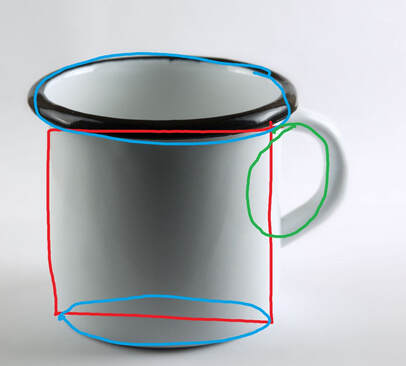
Image of a mug with colored lines drawn to indicate the basic shapes of the mug.
|
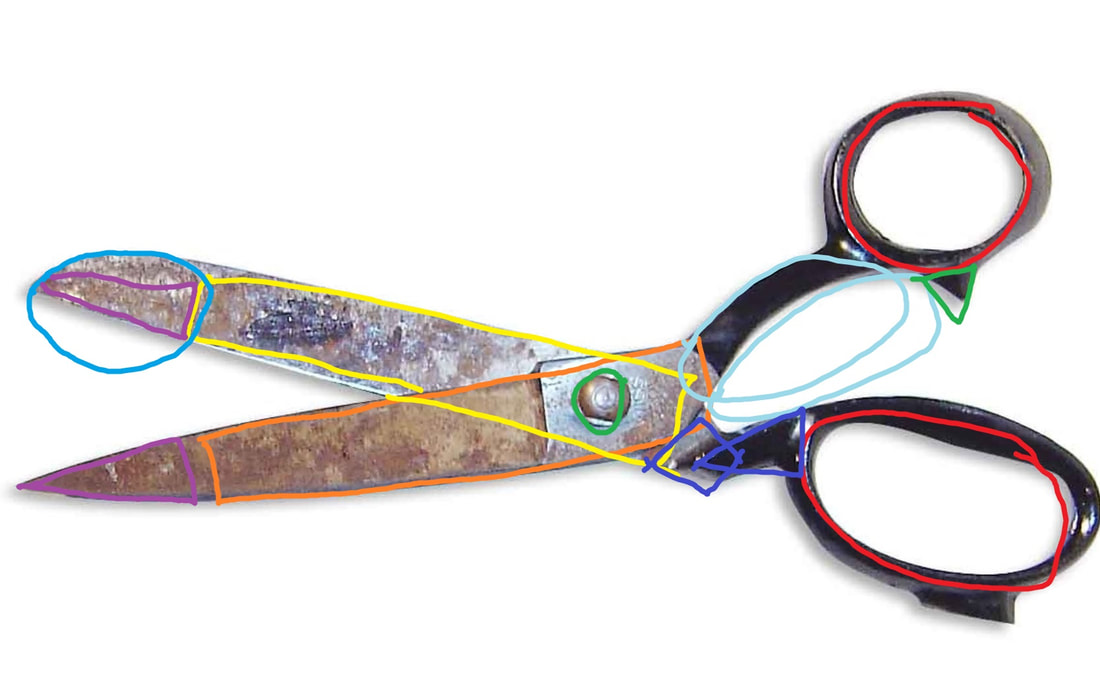
Scissors contain more shapes.
|
|
Learning Steps:
|
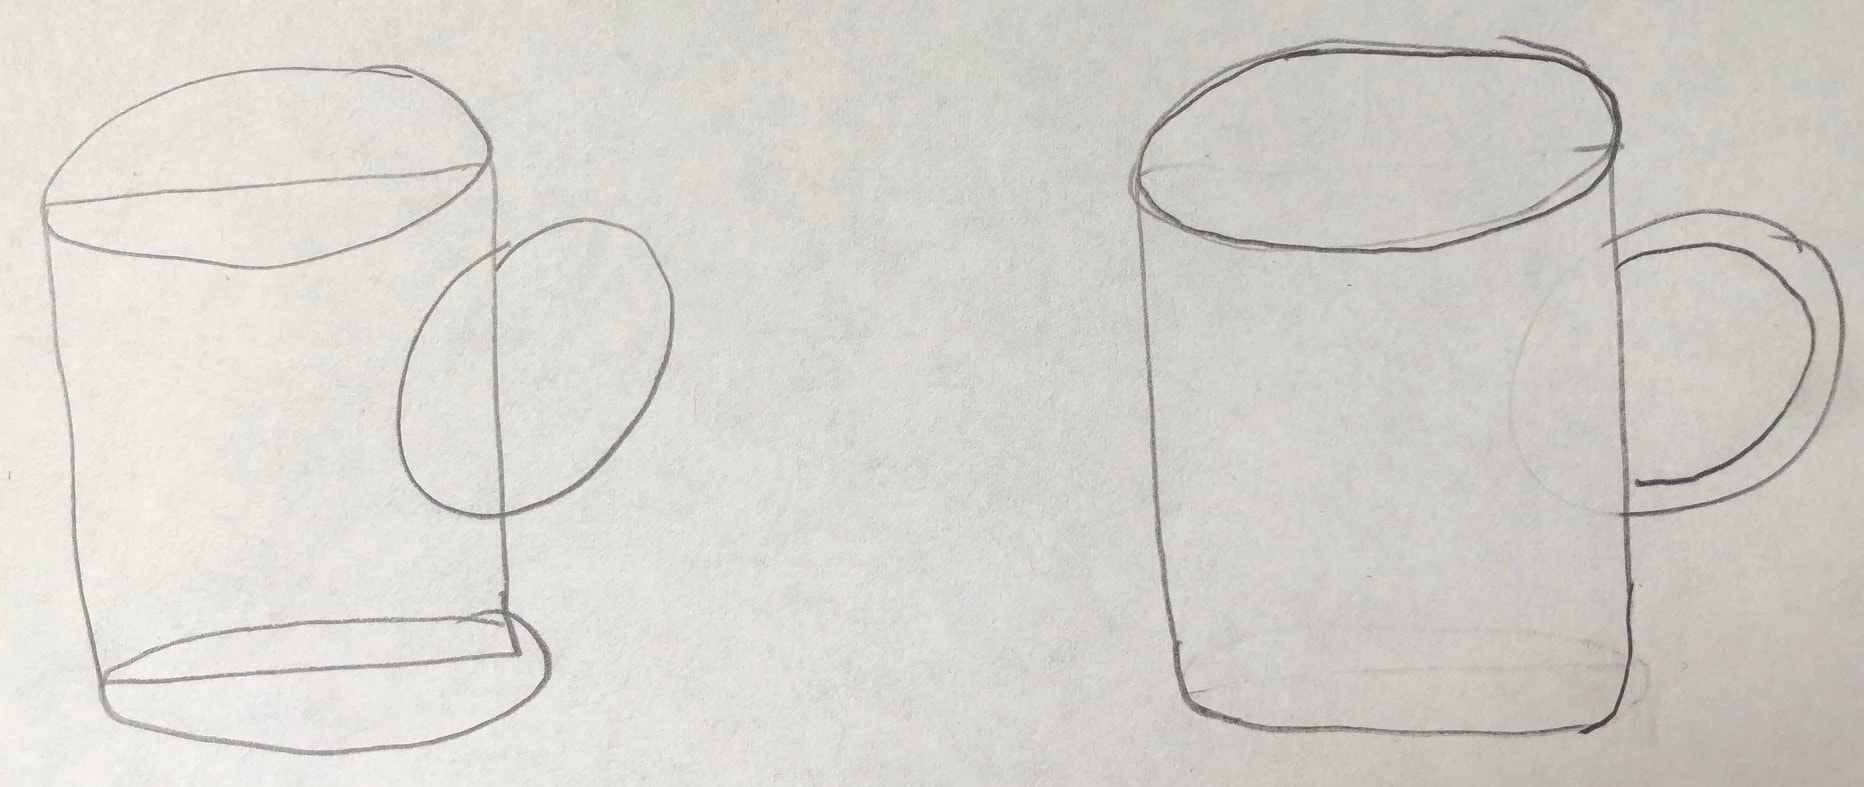
The mug on the left is prior to erasing extra shape lines. The mug on the right shows a more polished illustration.

Scissors drawn without erasing extra lines. The artist darkened the lines they wanted to keep.
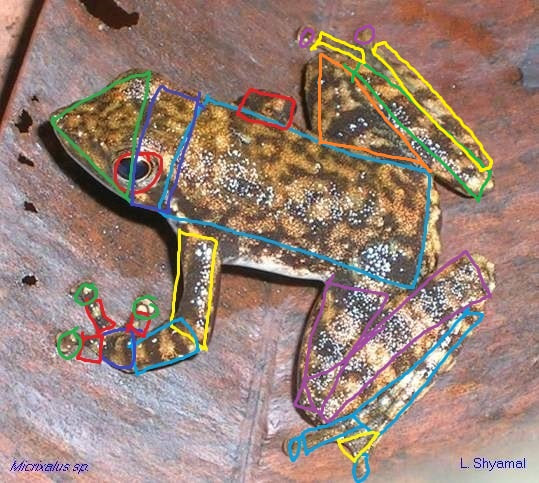
Natural objects may need more shapes to fill them in.
|
Lesson Conclusion:
Do an art walk. Everyone will display their favorite drawing in their notebook. Keep pages open with binder clips or heavy objects on top. Offer post-it notes if students want to cover up parts of the page to keep the focus on their favorite drawing.
Give students a few more post-its. Students will walk around the room and see what their classmates have done. Ask them to leave a message on a post-it on a few classmates' work. Make sure it's fair: ask them to make sure every notebook has 2-3 messages, ask them to make comments to both boys and girls, etc.
Technology Connection:
Draw.Chat is a free collaborative drawing platform. Start a new whiteboard and share the link with students. Paste a picture and draw on top of it. Open multiple pages to include several different objects. It also works on Safari on an iPad, for free (other tablets were not tested).
Draw.Chat is a free collaborative drawing platform. Start a new whiteboard and share the link with students. Paste a picture and draw on top of it. Open multiple pages to include several different objects. It also works on Safari on an iPad, for free (other tablets were not tested).
References:
Frank, Horst. (2003). Scissors [Photograph]. Wikimedia Commons. https://commons.wikimedia.org/w/index.php?curid=14260
Knoe. (2012). Mug [Photograph]. Wikimedia Commons. https://commons.wikimedia.org/w/index.php?curid=18793809
Shyamal, L. (2006). Micrixalus saxicola [Photograph]. Wikimedia Commons. https://commons.wikimedia.org/w/index.php?curid=757549
Research Connection:
There is much metacognition that goes into planning an accurate drawing (Baxter & Banko, 2018). A student must analyze the object and then go back and forth between the physical object and the 2D rendering to fully portray the object accurately. Judgments include how to color the object; represent size and shape; which parts to include or emphasize; and where to place different elements. Students must think about the scale and orientation of the drawing and include enough detail so that the drawing is recognizable as the object (Dotger & Walsh, 2014).
These lessons address the elements of art (shape, texture, space, color, and value) as well as how to arrange drawings on the page. Baxter & Banko (2018) provide several tips which were incorporated into these lessons, including an emphasis on elements of art such as color, shading, blending, and texture; the suggestion that early drawings should be done as a class; and that students can plan their drawing by tracing their idea with a finger in the air before doing a light pencil drawing. Baxter & Banko (2018) and Camacho et al. (2012) both discuss breaking an object into basic shapes and providing tracing tools for students who want them. Camacho et al. (2012) state that pencil marks should be “loose, light, and layered” and have students work without erasers at first (p. 70). Porter et al. (2011) included some of the lesson pieces including paint strip color matching, value strips, and texture rubbings.
